How Coolify Changed My Life and Allowed Me to Ship Faster
Ever since I first learned about containers in Django For Professionals, I’ve added container orchestration with Docker Compose on all my projects. Even my teammates jokingly started calling me “Docker Commander”. The thing was, I made them for dev first environments, worrying about deploying them on platforms like fly.io or Google Cloud Run later. This worked for a while, but could not be sustainable. Reading about the Vercel situation got me thinking I should consider self-hosted alternatives to avoid being vendor locked in and making shipping faster and easier.
Deploying Docker Compose on a VPS
This definitly was my first thought and was just how I started out at my first internship. It’s pretty simple, add a docker-compose.override.yml file that adds the caddy reverse proxy, and that should be enough to work! This does come with it’s drawbacks. I’d have to build my own pipelines, ci/cd, and manage the different containers in an easy and visual manner. Also, monitor and store logs for each container.
This works for one project at a time, but when I need to ship fast, managing various projects in my VPS would be a pain.
Enter Kubernetes
Kubernetes is an open-source container orchestration system that automates deployment, scaling, and management of containerized applications. It has features like:
- Automated rollouts and rollbacks
- Self-healing capabilities
- Horizontal scaling
- Service discovery and load balancing
- Secret and configuration management
This sounds awesome and just what I was looking for! As I was reading the docs and all other type of content, I realized this would be at least a 2-week long project to get right, even though I’m pretty comfortable with the command line and always wanted to see what Kubernetes is all about. I needed to ship now and this seemed a bit too complex and a potential rabbit hole for my current needs. I’ll definitly try it out when I have the time and need the scaling, but for now it was back to the drawing board.
Tech Twitter to the Rescue
As I mentioned before, the Vercel incident was what triggered my desire to self host and Tech Twitter users took the time to layout alternatives to various Next.js beginners stuck on the platform. Coolify was the most hyped-up open source PaaS, so I decided to check it out. And let me tell you, it was the easiest thing I’ve done in a while. I rented out a $15 VPS on Hetzner with the following stats:
| Key | Value |
|---|---|
| Disk GBs | 160 |
| Num Cores | 4 |
| Memory GBs | 8 |
| Data Transfer | 20,000 |
After configuring users and my firewall settings, I just ran the following command specified on the docs:
curl -fsSL https://cdn.coollabs.io/coolify/install.sh | bash
And that’s it! This’ll set up the Coolify containers, grant permission to Coolify to create and read, and create a Coolify Docker network. Just wait while it finishes installing and you’ll be greeted by this dashboard.
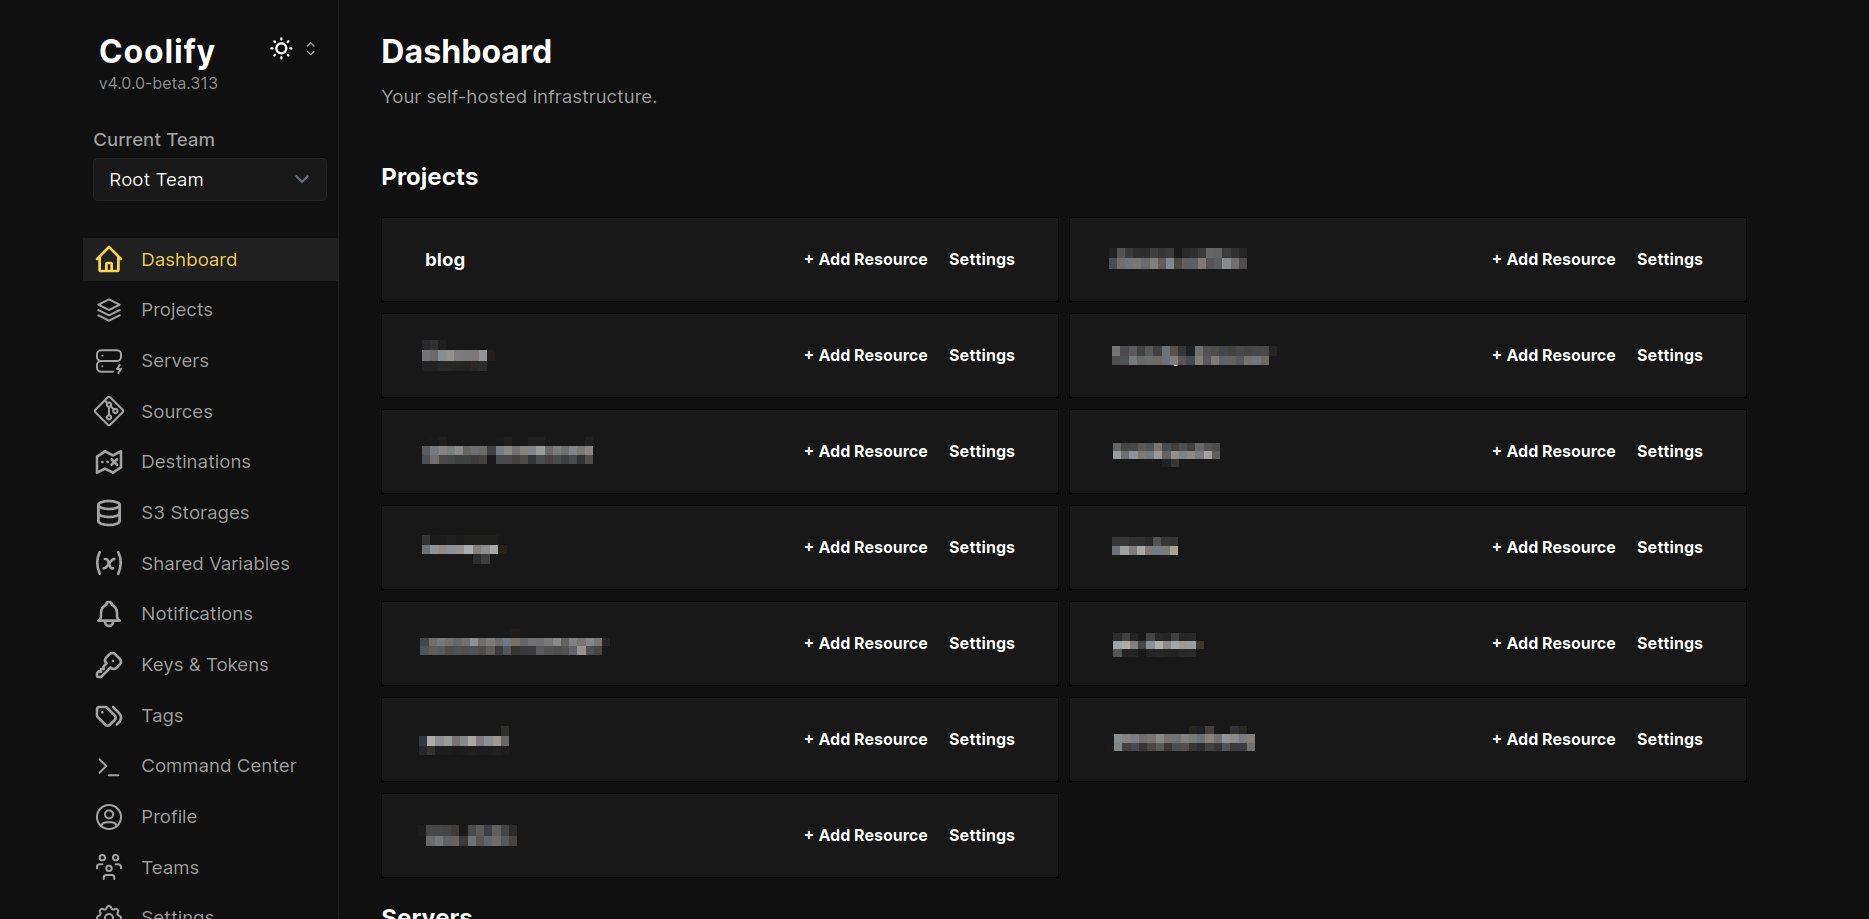
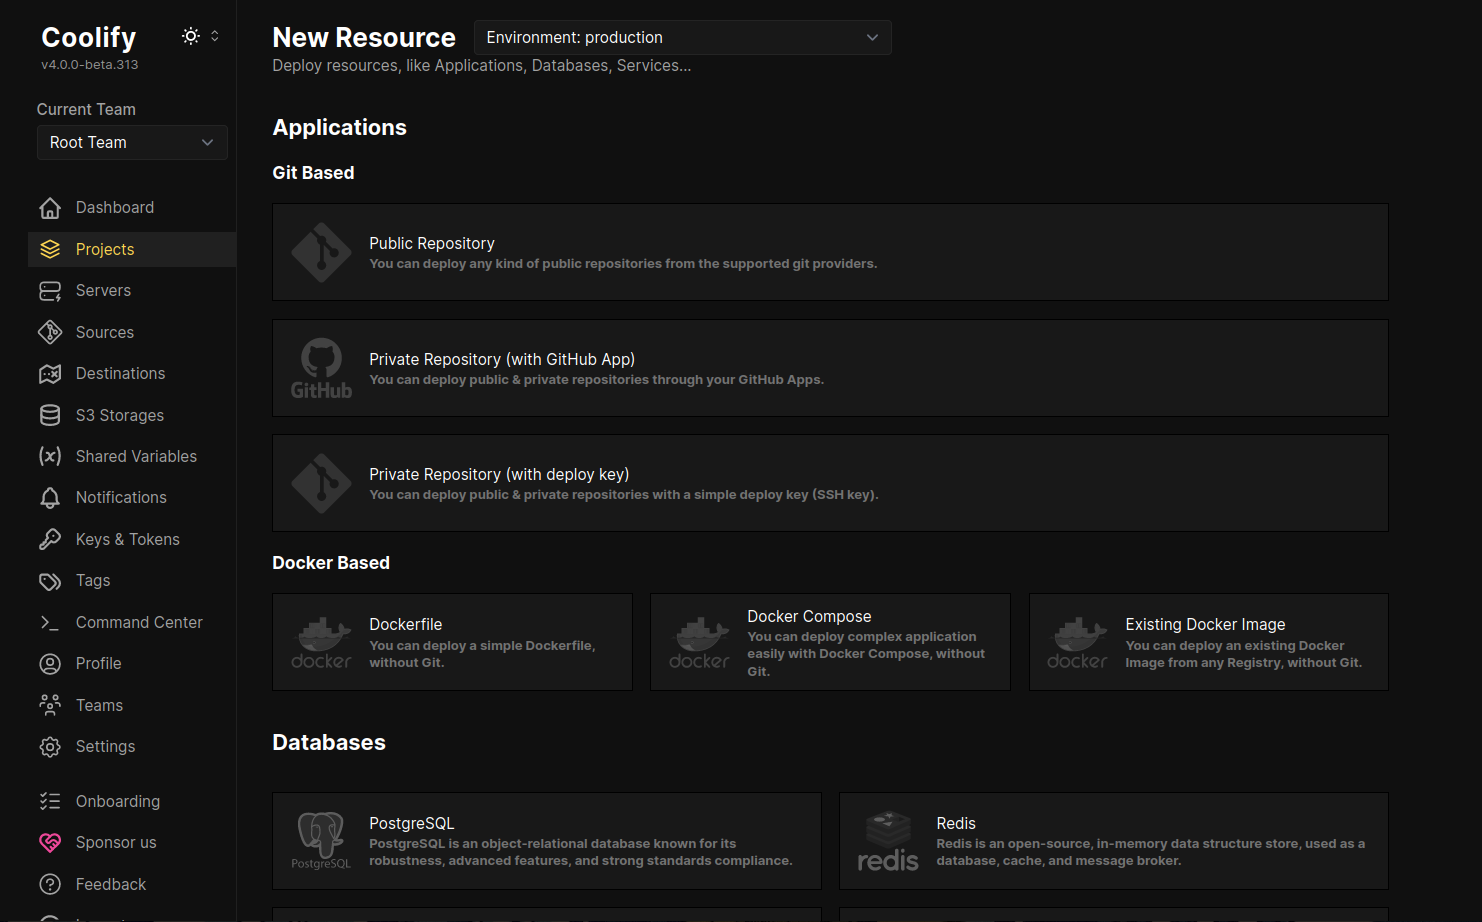
You can then create projects and in those projects create resources by linking a Github repo or writing a Dockerfile.
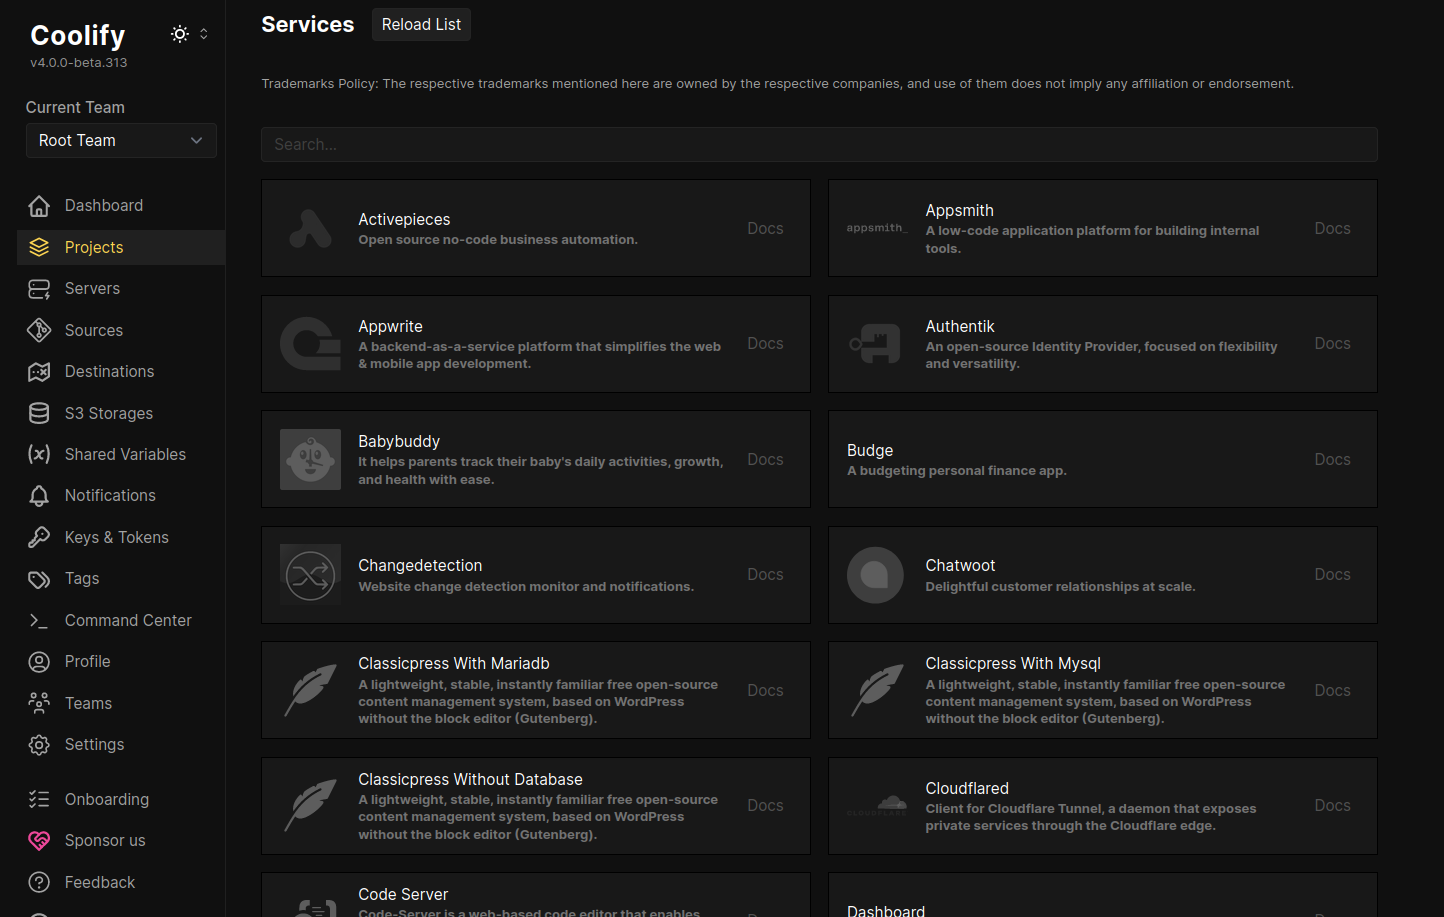
Coolify’s coolest feature is for sure the pre-configured services. That’s how I discovered various open-source services I could use to my advantage. In less than a day, I had running:
- A personal finance app (Firefly III)
- Password manager (Vaultwarden)
- Open source observability platform (Grafana)
- VPS stats viewer (Glances)
- RSS and social media feed (Glance)
- No-code dashboard for SQL databases (Metabase)
- Firebase alternative (Pocketbase)
And there’s still a ton more I could use later when needed.
You can also manage other servers with their own resources if necessary, especially for freelancing projects and resource intensive applications that may slow down Coolify (this is actually the recommended way to deploy in the Coolify docs).
Backups, S3 storage, subdomains, REST API, email/telegram notifications, CI/CD, webhooks, cron jobs, and more is possible with this tool. Coolify has allowed me to ship fast and concentrate on my code.